|
|
| Register | Forums | Blogs | Today's Posts | Search | Donate |
 |
 |
 |
|
|
|
#1
 06-07-2017, 11:34 AM
|
|||||
|
|||||
|
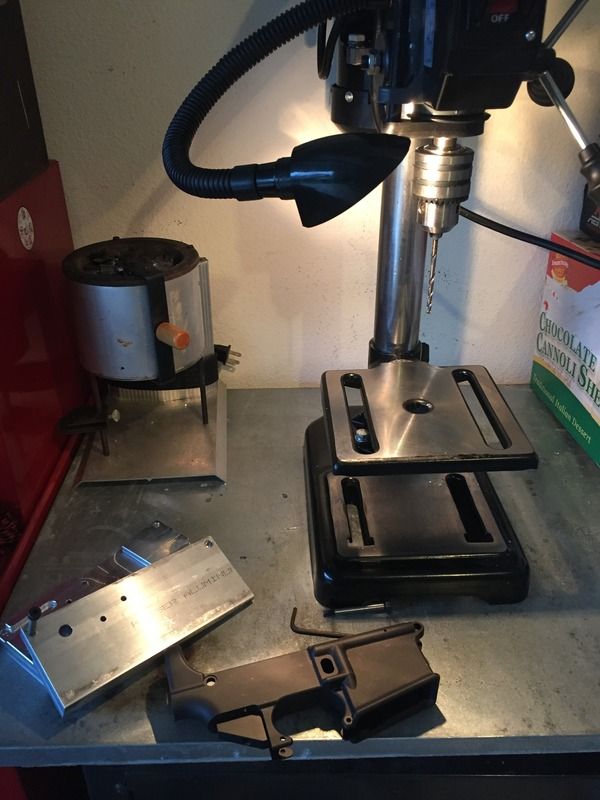
Okay, I want this to be simple as possible to follow so I am creating a new thread with the stages i did it in. Acquiring the materials, drilling, milling and assembling. I don't have time to do everything at once but will update the thread as I am able to.
Here are the materials I either bought or already had 80% lower http://www.rangetool.com/store/index...80percent.html 80% lower jig http://www.rangetool.com/store/index...lower-jig.html End Mill https://www.midwayusa.com/product/84...m-1-4-end-mill Other tools I either already had or are general purpose: 5/32, 3/8, cobalt drill bits Harbor Freight drill press WD40 Shop vice
__________________
CBOB0746 NRA Life Member Florida CWL Since 1992 Last edited by Gatorade; 06-07-2017 at 11:41 AM. 
|
|
#2
06-07-2017, 11:35 AM
|
|||||
|
|||||
|
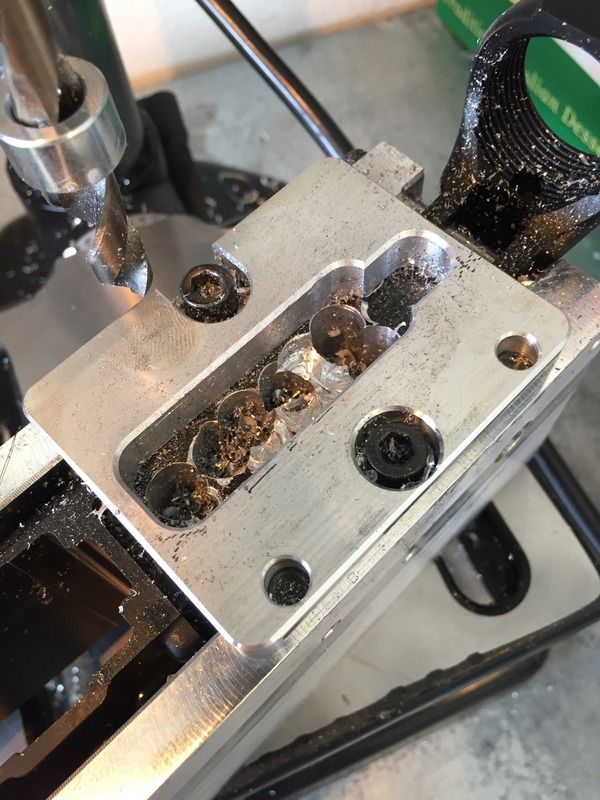
Assembling the jig and drilling the safety and trigger pin holes.
 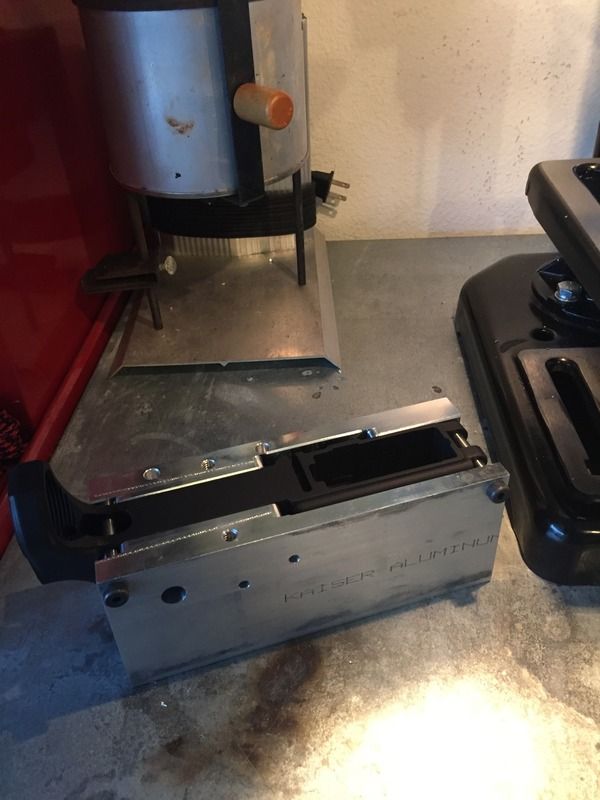   I switched the clamp to a metal clamp that was made for drill presses for the second Lower. The metal clamp was much stronger and made drilling easier. I went a little too fast with one of the holes and there was some binding that stopped the drill. I tapped the jig off the bit, added some WD40 and went slower. One other note, I am doing two lowers so I wanted to drill these holes with fresh new bits. Drilling the holes for removal of the material in the trigger pocket may wear the bit so I wanted those holes drilled with new bits.
__________________
CBOB0746 NRA Life Member Florida CWL Since 1992 Last edited by Gatorade; 06-07-2017 at 02:08 PM.
|
|
#3
06-07-2017, 11:35 AM
|
|||||
|
|||||
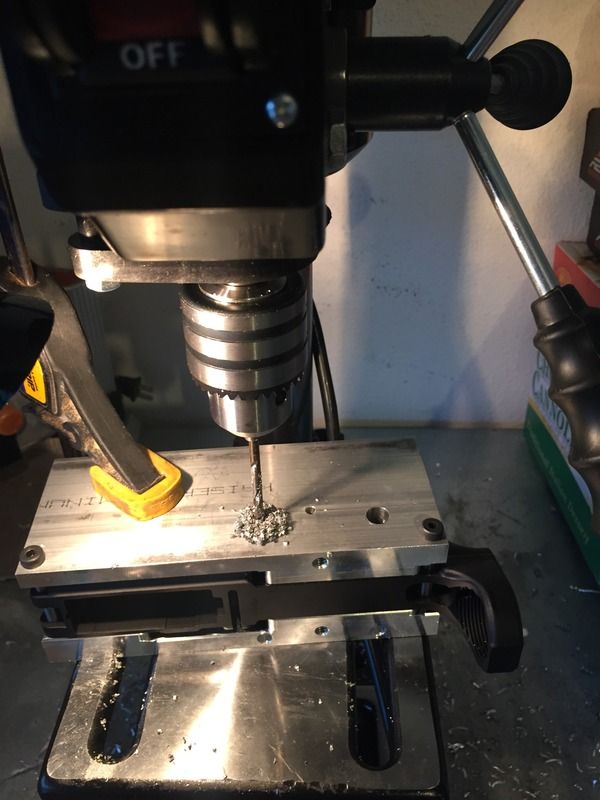
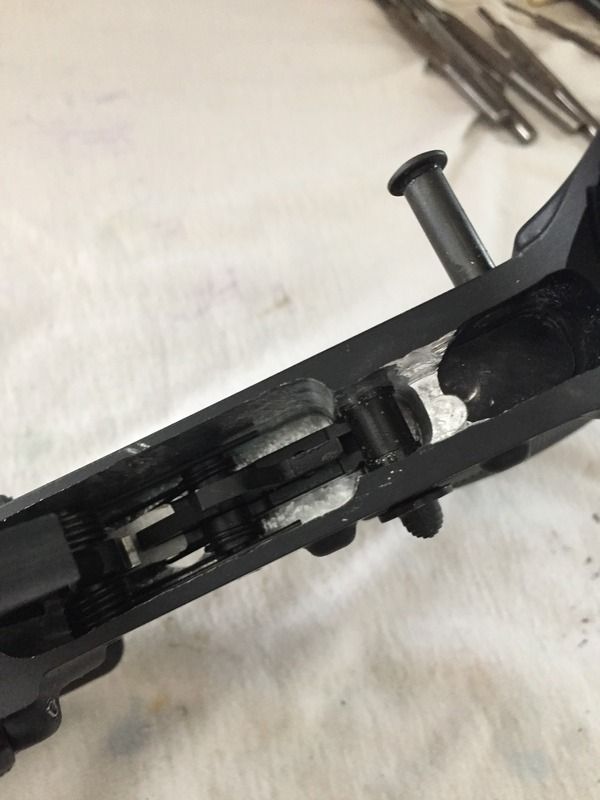
 My jig set didn't have the drill guides so I had to free hand it, I tried using the 5/32nd bit to drill pilot holes for the 3/4 bit. That didn't work out so well for me. I didn't want to make a mistake so I only went about half as deep in the pocket and will go deeper for a second adjustment. The smaller holes were not aligned with where the larger ones would be and I was going at too slow a speed. Looks a mess and I was not happy but was going to see how it would be after the end mill went in. I got a little close to the guide on a couple holes. 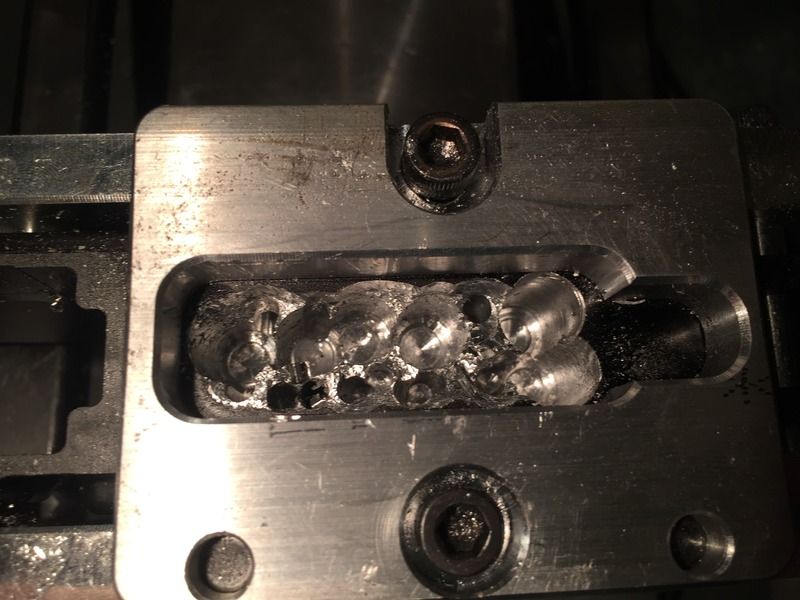 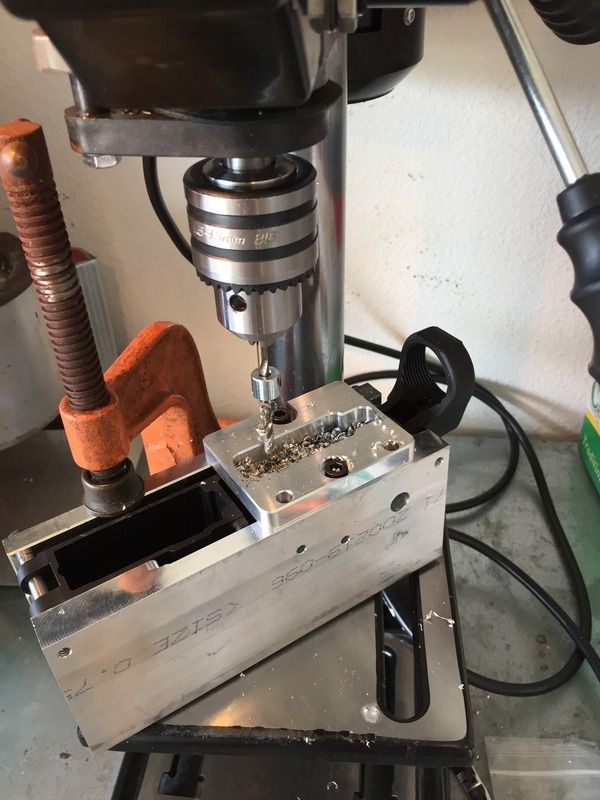 The endmill did its job and my lack of machining skills are evident. I did read up last night and found out my drill speed was way too low. Speeding up the drill worked better with the endmill but it was pretty rough and lots of chatter if I tried to push it too fast. When I got deeper I was able to use the jig top plate as a guide for the smooth shank of the mill.  Not finished but looking better. You can see the trigger pin holes and I have re drilled deeper with the 3/4 bit. Faster speed made that much easier. I am leaving the back section for right now because that is a different depth and I want to get the main pocket cleared out first. It won't win a beauty contest but I have heard some sand paper and a dremmel may help the smoothness on the inside. Truth be told I would be happy if it just functions well no matter how it looks inside. This is the first and I will be doing more so I can only hope to get better as well. More milling later! Milled out the front pocket and the safety pocket. Could have gone a little farther on the safety pocket but it looks like it will clear everything. Put the drill guide for the trigger slot. Two big holes should have been easy but looks like I walked one one the holes just a bit. 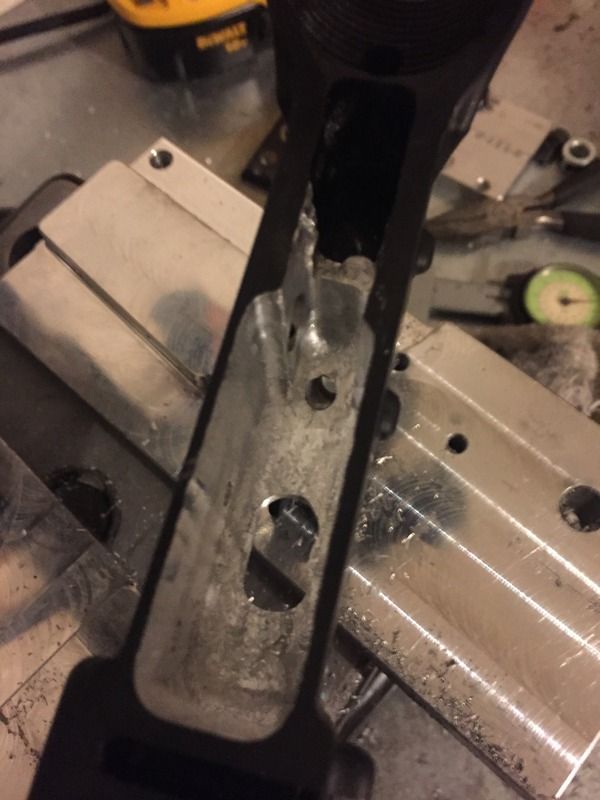 Finished milling! (Or so I thought!)
__________________
CBOB0746 NRA Life Member Florida CWL Since 1992 Last edited by Gatorade; 06-12-2017 at 01:08 PM.
|
|
#4
06-07-2017, 11:36 AM
|
|||||
|
|||||
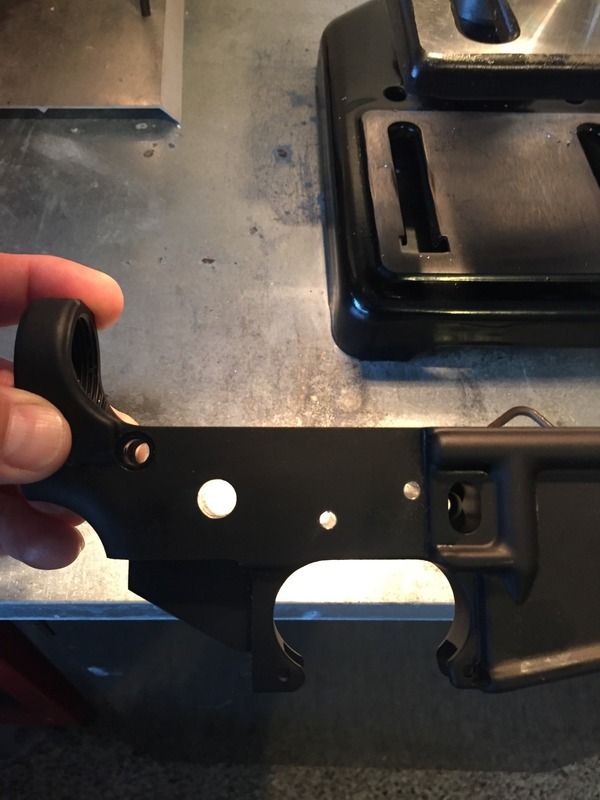
 Stripped the parts off another build and assembled them! The trigger pin holes are not as tight as my other factory lowers. Anti-roll pins will take care of that. 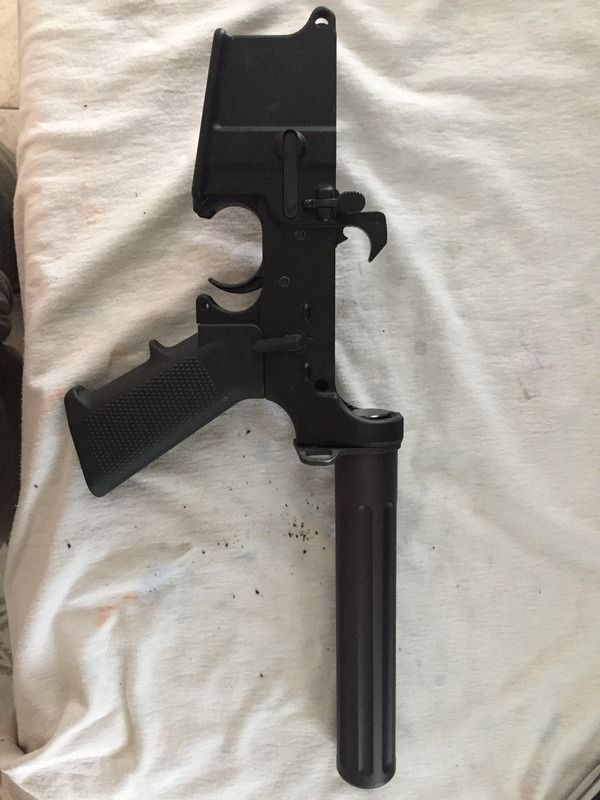 The rest of the assembly went great! Safety works, trigger works. Bolt catch works, mag release works all set!  The rear take down shelf was already milled out from Range Tool. I left it as is and it looks like it may be about 1/64" or 1/32" too tall. The rear takedown lug on one of my uppers wouldn't fit. I am going to try and smooth the insides out with a dremmel sander and that should also take the top off that rear shelf. One of my PSA uppers fit but I had to get a punch and force the rear pin out to remove it. 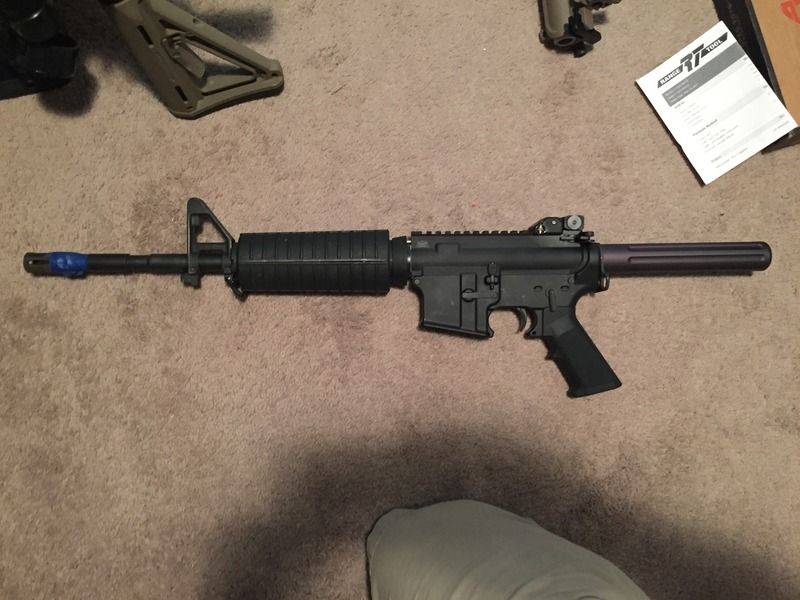 On the whole it is my first pretty much complete AR lower. It functions and is not pretty but looks like it will be functioning soon! Woo Hoo!
__________________
CBOB0746 NRA Life Member Florida CWL Since 1992 Last edited by Gatorade; 06-12-2017 at 01:34 PM.
|
|
#6
06-07-2017, 12:42 PM
|
|||||
|
|||||
|
May I suggest to
 that this thread become a 'Sticky'. that this thread become a 'Sticky'.
__________________
Rich COTEP #762 A gun is a tool, no better or no worse than any other tool: an axe, a shovel or anything. A gun is as good or as bad as the man using it. Remember that. And shepherds we shall be, for Thee, my Lord, for Thee. Power hath descended forth from Thy hand, that our feet may swiftly carry out Thy command. So we shall flow a river forth to Thee, and teeming with souls shall it ever be. In nomine Patris, et Filii, et Spiritus Sancti.
|
|
#8
06-13-2017, 12:15 AM
|
|||||
|
|||||
|
Stuck for Gatorade and for further reference point,

__________________
CBOB:0002 1905 Savage 380, 1978, 1980 DW Pistol Pacs, Severns Custom 1985 Springer 1911A1, 09 DW Marksman, S&W Model 19-6, GSG 1911 22LR. , S&W Model 29-2
|
|
#9
07-01-2017, 10:42 PM
|
|||||
|
|||||
|
I took off a little on that rear shelf but it was still not lining up, so I took a rat tail file to the rear take down holes and just cleaned it up a touch. Fits nice and tight!
I was also able to get to the range today and it function checked great! I don't know if the pics are still holding up with the new Photobucket deal but it is a success! I am working on the second one but got a little over confident while milling the trigger pocket and pushed a little hard on the front wall that is the rear of the magazine well and milled a small hole through to the mag well. I will get back and finish that one later and see if it is salvagible. The hole is small and some of those skeletonized lowers actually have more missing but it is not as good as the first completed one.
__________________
CBOB0746 NRA Life Member Florida CWL Since 1992
|


 Hybrid Mode